


 Thermal Monoculars
 Thermal Binoculars
 Thermal Rifle Scopes
 Thermal Clip-On Systems
 Thermal Accessories
 Digital Weapon Sights
 Digital Clip-On Systems
 Night Vision Monoculars
 Night Vision Binoculars
 Night Vision Goggles
 Night Vision Weapon Sights
 Night Vision Clip-On Systems
 AGM Image intensifier Tubes
 Night Vision Accessories
 Fusion Imaging Monoculars
 Fusion Imaging Binoculars
 Laser Systems
 IR Lights
 Helmets & Mounts
 Weapon Mounts
 Miscellaneous
 SKD Kits
 PVS 14 Spare Parts
 PVS 7 Spare Parts


This product is not exportable outside the United States.
![]()
By adding this item to cart, you agree and acknowledge the Export Policy and confirm that you are a person in the United States with no intentions to illegally export the device.
This product is not exportable outside the United States.
![]()
By adding this item to cart, you agree and acknowledge the Export Policy and confirm that you are a person in the United States with no intentions to illegally export the device.
It seems an excellent idea to extend the range of your vision to low-light or no-light conditions, mainly if it guarantees you night-prolonged hunting or airsoft gaming experience. The night vision scope may do it for you.
However, the most demotivating factor you may come across is the price. No, every person can easily afford it. So, for those who are still thinking about what is the better option – to buy an already-made rather pricy gadget or to purchase the necessary components and make one yourself, let us provide you some short briefing of the essential steps you may need to undertake if you would choose to try the latter option.
But before you proceed, you should necessarily research carefully whether it complies with your country’s jurisdiction to own, use and/or produce night vision scope and purchase the required materials for making the device.
If there are no restrictions concerning these issues, you can follow the below general steps.
First of all, you should understand the general principles of the device’s operation and the logical scope of work you will need to do.
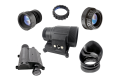
The device should include a magnifying lens for the incoming low-intensity visible spectrum and/or infrared light to be initially intensified and focused, a Generation 1 intensifier tube with a photocathode to increase the flow of the incoming light photons by a flow of emitted electrons which will then be converted back into a much more significant amount of light photons with a phosphor-covered screen, and an output ocular, containing a magnifying lens as well.
Then you should make a list of things you will need to purchase for the procedure and search where you can find and order these components and materials.
Besides the above-mentioned essential items, you will need additional materials and equipment to do the associated assembly jobs. Thus, you will need a plastic or metal-sheet tube, electric wires, adaptor rings, AA or AAA batteries, and a plastic box of the appropriate size to use a battery casing, magnifying reading glass, and some other equipment. A hot-glue gun, pliers, probably a drill and a knife, a soldering iron, a set of screwdrivers, a multimeter, and some other tooling may also be required.
If you plan to use a plastic tube for the casing, you will need some primer and paint (better in spray). Adhesive black or aluminum tape, insulation tape, and masking paper will also be required.
With the metal-sheet tube as the casing, you will not need additional isolation from the exterior light, so you will not need to apply the primer and paint.
If you intend to use the device as a night vision rifle scope and see complete darkness, you should also buy an infrared LED light and the associated attachment fittings.
Before buying all these things, read carefully all the available information regarding the measurements, compatibility, and other characteristics of the main components and fitting elements you intend to purchase. It will save you money and additional efforts when assembling the night vision scope.
You can start the assembling process when you get all these things and materials.
First, make sure that your work area is clean and clear of dust, dirt, debris, and items unnecessary for the assembly works.
Next, you should use the batteries and the wires to test if the intensifier tube you purchased works fine. The intensifier requires 3 to 6 volts of direct current to operate, so feel at ease connecting the wires and checking it. You will undoubtedly need to test it in the darkness. You will hardly get much high-quality output using it without a magnifying lens and the light protective casing. Still, you will see whether the intensifier is operative, and you can proceed with it.
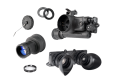
The general idea is to mount the incoming lens and the ocular eye-piece onto the intensifier tube and place the assembly into the protective casing made of a plastic tube cut to the appropriate size. You can either use epoxy glue, but a better option is to use threaded adaptor rings of the proper diameter. This will allow you to disassemble and re-assemble the components with ease.
The device also needs to be powered to function correctly, so you will need to solder the wires to the intensifier tube, the battery casing, and the toggle switch in the correct sequence, considering the polarity.
Note: Be careful not to solder the wire end to the positive terminal hole of the intensifier tube. Use a screw of an appropriate size instead to connect the wire to this terminal; otherwise, heat high-temperature soldering may discontinue the wire connecting elements inside the brass terminal.
As for the covering plastic tube and all the connecting elements, make sure they are lightproof. Otherwise, your self-made device will not function properly.
Suppose the checking reveals that the plastic tube and the mounting joints still penetrate the light. In that case, you can cover your tube casing parts with primer and paint, previously applying the masking tape to the lenses and other areas which should not be affected.
Another critical issue is ensuring that the intensifier is securely fastened inside the casing. It can be done either by winding the adhesive tape around the intensifier until it is covered with a layer of this tape big enough to provide its fast positioning, or you should think of some alternative method of securing it inside the casing.
Then you should test the intensifier placed within the tube casing together with the magnifying and eye-piece lenses to check that they are correctly adjusted and give you a good and reliable output image. If not, you will need to shift the intensifier forwards or backward inside the tube casing for a better output picture or even modify the length of the tube casing. Minor focusing adjustments may be made by screwing in and out the threaded adaptors of the lenses.
The adjustment procedure should be performed in a dark place with a distant target in view to do the focusing.
Note: Be extra careful not to damage the phosphor-covered screen when doing all the manipulations mentioned above.
When you gain the proper inter-positioning of these three most essential components of your night vision scope regarding the right focusing, you can secure the structure inside the tube casing and ensure lightproof tightening of both threaded ends of the case.
Next, you can attach your night vision device to the scope mounting base of the rifle by using the appropriate attachment fittings. It is a good idea to secure the infrared LED light on the gun using a unique attachment ring.
Please be aware that the device will give some additional weight to the rifle, so acquiring a bipod to use with the gun, equipped with the night vision scope, the batteries, and the infrared light, maybe a good idea.
Table of contents