


 Thermal Monoculars
 Thermal Binoculars
 Thermal Rifle Scopes
 Thermal Clip-On Systems
 Thermal Accessories
 Digital Weapon Sights
 Digital Clip-On Systems
 Night Vision Monoculars
 Night Vision Binoculars
 Night Vision Goggles
 Night Vision Weapon Sights
 Night Vision Clip-On Systems
 AGM Image intensifier Tubes
 Night Vision Accessories
 Fusion Imaging Monoculars
 Fusion Imaging Binoculars
 Laser Systems
 IR Lights
 Helmets & Mounts
 Weapon Mounts
 Miscellaneous
 SKD Kits
 PVS 14 Spare Parts
 PVS 7 Spare Parts


This product is not exportable outside the United States.
![]()
By adding this item to cart, you agree and acknowledge the Export Policy and confirm that you are a person in the United States with no intentions to illegally export the device.
This product is not exportable outside the United States.
![]()
By adding this item to cart, you agree and acknowledge the Export Policy and confirm that you are a person in the United States with no intentions to illegally export the device.
Whether you purchase an off-the-shelf rifle or build out your own. Having a dedicated night hunting rifle to run your thermal scope is the most common choice among coyote and hog hunters. In this article, you'll be able to take a closer look at a night hunter's setup, and the components he chose.
My first foray into building rifles started with this no-frills, tack-driver. At the time, I had a modest budget of $1,000 and yet my expectations remained high. The goal for this rifle was to accurately hit targets at mid-range distances while remaining light enough to comfortably carry all day on a coyote hunt. Living in New Jersey at the time, I faced further design constraints regarding which products I was legally allowed to assemble onto my AR-15. Here are the components that I chose for this build and why. Since accuracy was paramount for this rifle, I spent the largest portion of my budget on the barrel and chose a stainless steel Rainier Arms 16” match barrel chambered in .223 Wylde. This chambering allows the rifle to safely shoot both .223 Remington and 5.56x45mm ammunition. In addition, the .223 Wylde’s shorter freebore dimension provides increased accuracy over the commonly-machined 5.56 chambering. Other accuracy-enhancing components include the freefloat handguard from Midwest Industries and the three-port muzzle brake, which helps me spot my shots at longer distances by reducing felt-recoil. The remaining components on this rifle build were fairly basic - a nickel boron-coated bolt carrier for easy cleaning and increased lubricity, a $20 blem DPMS stripped upper receiver that I bought while competing at Camp Perry, a mil-spec lower parts kit, a Palmetto State Armory stripped lower receiver, an affordable LPVO from Primary Arms, and a fixed stock (thanks, New Jersey) from Luth-AR. After a couple afternoons spent bingeing Brownells how-to videos, I went into my shop and - presto! - assembled my first AR-15. A trip to the shooting range proved that my research was time well spent and that the component selections were good choices as the rifle consistently produced sub-MOA groups.
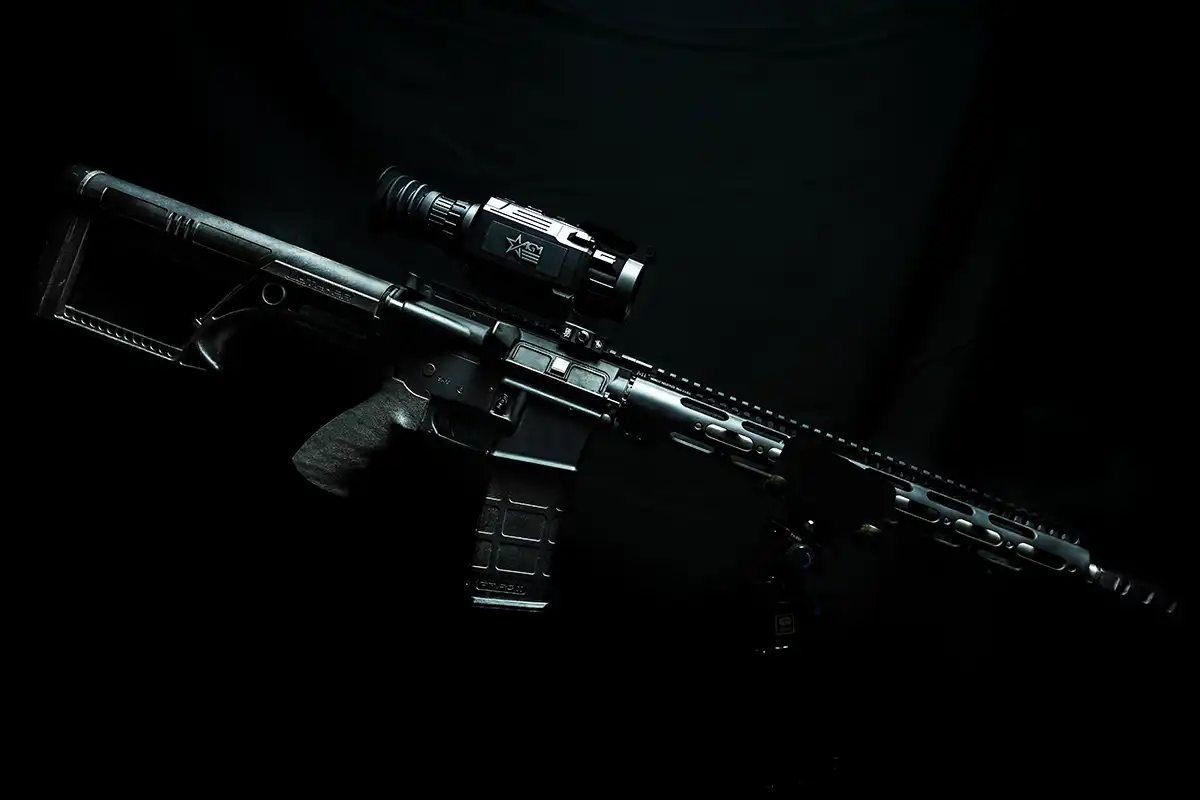
Withstanding the test of time (nine years and counting) and my inclination for tinkering, this build has largely remained unaltered for the past nine years because the rifle just flat-out shoots. I have since left New Jersey, relocating to Montana, and now having the good fortune of being able to hunt coyotes year-round, day and night. In order to capitalize on this opportunity, I had to make one key alteration to this rifle – the incorporation of the AGM Rattler V2 Thermal Imaging Scope.
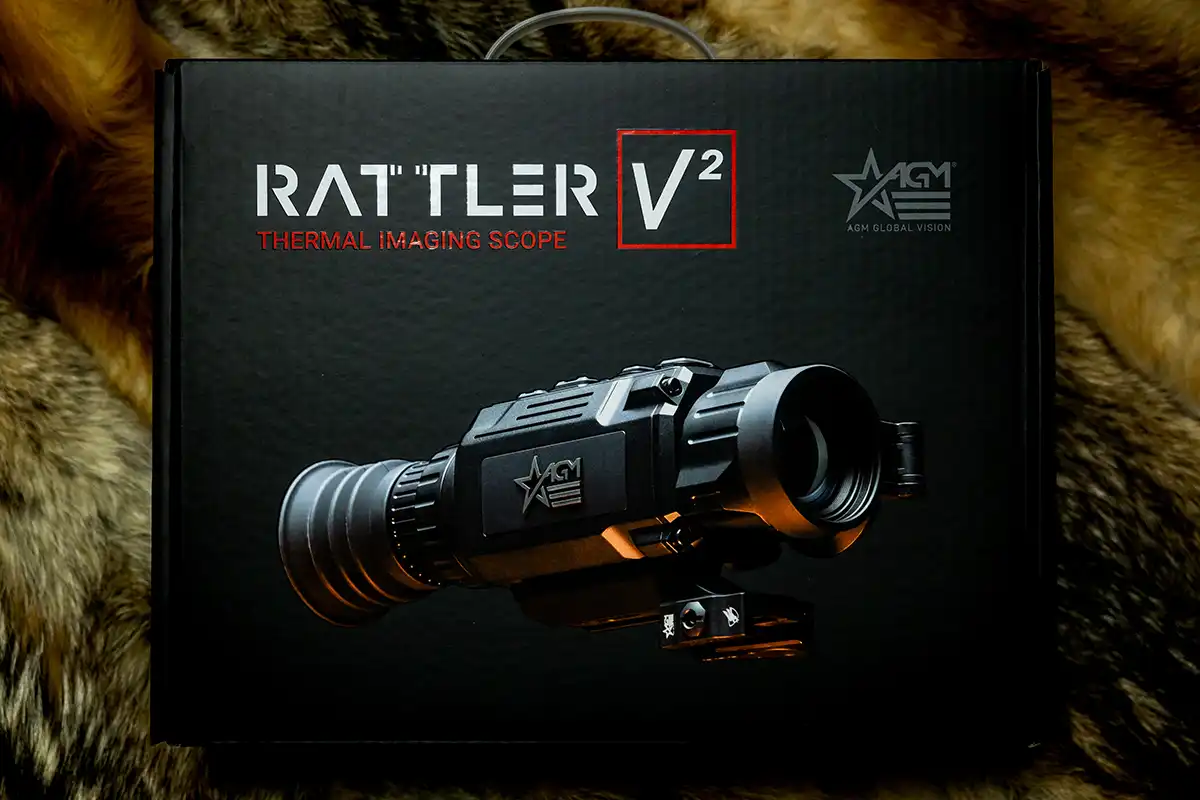
This thermal optic was the perfect match for my no-frills, tack-driver rifle. Since thermal technology works well in both daylight and pitch-black darkness, this optic allows me to hunt around the clock without having to swap between a traditional telescopic sight and a night vision scope or clip-on device. An additional benefit to choosing thermal is that, unlike night vision, this imaging technology does not rely on ambient light or IR illumination in order to work. This means that I can effectively hunt on totally cloudy nights when there is no moonlight, a common occurrence here in NW Montana during winter’s peak fur months. My northern latitude also guarantees that I will encounter plenty of snow and freezing temperatures. The Rattle V2’s waterproofing, all-day-long battery life and tactile button layout enables the optic to excel in this harsh winter climate.
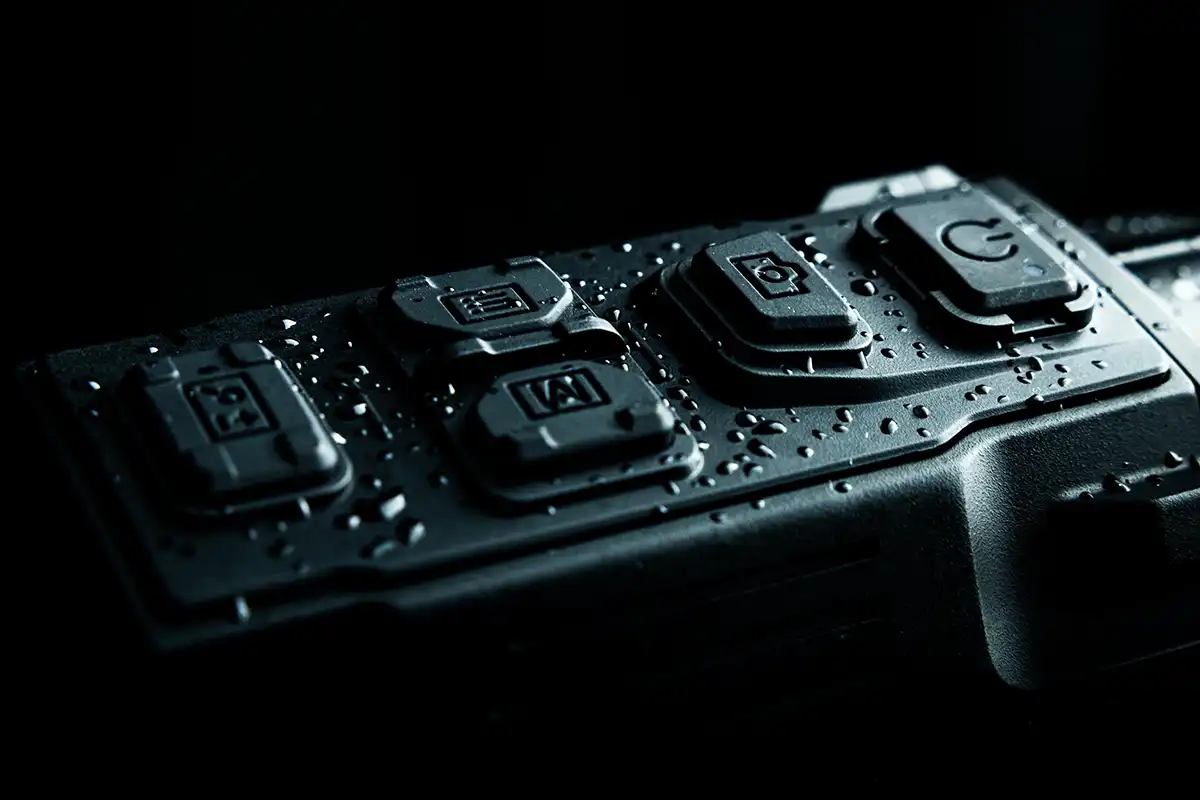
Two design improvements that I greatly appreciate over the original Rattler are the new button layout as well as the focus ring’s shorter travel-distance and its extended throw knobs. The rib dividing the color palette and menu buttons helps me distinguish between the two when I am wearing gloves. The new focus ring controls allow me to operate the device in total darkness, making obsolete my old habit of turning on a red headlamp to see my optic’s controls. In these myriad of ways, the Rattler V2 has met my demanding criteria for shrugging off a Montana winter and has granted me the ability to accurately engage coyotes in the day and night. I anticipate that this thermal will remain on my no-frills, tack-driver rifle for its next nine years, or more, of use!
Comment below and share all the must-haves that night hunters should get when building out their first night hunting setup!
Table of contents